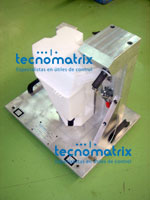
Plastic tank
For this type of parts, you must check that all the holes positions are OK for a proper fitting of the part on the car. In order to prevent collisions during the mounting process, you will also need to check the part outline to make sure that it is within tolerances. Checking fixture example.
Our checking fixtures are produced in aluminium, the components submitted to wear-and-tear are produced in steel. Tolerances for RPS (fixation points) and dial indicator points: ±0.05mm. Tolerances for simulation blocks: ±0.1mm.
Minimum documentation: dimensional report of your checking fixture, 2D assembly drawing, assembly CAD. Optional documentation: R&R report, user manual, stabilization certificate.
CMM fixture for Plastic Tank

